

Internationalizing your website is a good idea but it can be a difficult process. Thankfully there are tools to help. This blog will look at how we can use gettext to add multiple languages in Django. We will cover topics such as: why you may want to internationalize and how you can use gettext to simplify the process.
What is Internationalization & why you should use it?
Internationalization is a mechanism of software development that enables an application to support other languages, character sets, or both. To accomplish this, an application must be able to contain locales that contain translations for all messages, enabling the software to display resources in the correct language. Internationalization is usually the first step toward creating a global software application.
Prerequisites:
gettext:
Gettext is a set of tools that provides a framework for translating messages in software source code into different languages. It provides a set of conventions and rules about how to organize the translation files, as well as programs for extracting or updating translations from various sources, some interactive ones like GNU gettext, and some batch-oriented ones like gettext.
The GNU gettext package contains functions for producing messages in different languages, typically used by programmers who want their software to be able to speak multiple languages.
How to install gettext in Linux:
To install gettext use the following command in your terminal
sudo apt-get install gettextHow to install gettext in windows:
To install gettext in windows go to the following link then download and install the application
https://mlocati.github.io/articles/gettext-iconv-windows.html
Django:
In this tutorial, we are going to use the Django framework, for example, it is a python based open-source framework which is used by web developers to create complex web applications. Django is known for its easy-to-use and fast development process. To install Django use the following command in your command prompt
pip3 install DjangoImplimantiaion of gettext in Django:
Step 1: Create a new Django project
For the integration of gettext in Django, let’s first create a simple Django app you first Create a directory named anything you want I created a folder named gettext then open a terminal in the same folder and create a new Django app for that use the following command in your command prompt.
1. For starting a new project
Django-admin startproject translation_example3. Go into the project folder
cd translation_example3. Starting the new app in the project
django-admin startapp exampleStep 2: Configure a Django project
For configuring the Django project open the project in the code editor and follow the steps
1: Adding the app to the project
Open setting.py and add the example app in the project
INSTALLED_APPS = [
    'django.contrib.admin',
    'django.contrib.auth',
    'django.contrib.contenttypes',
    'django.contrib.sessions',
    'django.contrib.messages',
    'django.contrib.staticfiles',
    'example',
]
2: Creating views
Here we configured a views.py, we imported the gettext module as a _ for ease of use then we marked the hello as the text to be translated, now what Djnaog will do is go through all the projects and search for all text that is marked as being for translation and translate that.
from django.shortcuts import render
from django.utils.translation import gettext as _

def index(request):
    context = {
        'hello' : _('Hello')
    }
    return render(request, 'index.html', context)
3: creating a configuring the temples
First, we created a new directory named with template and then created an index.html file in the directory, second you can copy-paste the following code in your index.html file and then add text that we will be translating to another language.
<!-- adding the load tag -->
{% load i18n %}
<!DOCTYPE html>
<html lang="en">
<head>
    <meta charset="UTF-8">
    <meta http-equiv="X-UA-Compatible" content="IE=edge">
    <meta name="viewport" content="width=device-width, initial-scale=1.0">
    <title>gettext example</title>
</head>
<body>
    <h1>{{ hello }}</h1>
    <!-- here we marked the h2 is the trans tag so that gettext will know that this has to be translated -->
    <h2>{% trans "welcome to geeky humans, here you will find many interesting article about python" %}</h2>
</body>
</html>
4: Configuring the url.py
Add the following code to your ulr.py file
from django.contrib import admin
from django.urls import path
#importing the views
from example import views

urlpatterns = [
    path('admin/', admin.site.urls),
    #creating the path for the views
    path('', views.index)
]
5: Migrating our project
For migration run the following command the command prompt
python manage.py makemigrations
python manage.py migrate
After migration check, the project is working properly or not by using this command in your command prompt
python manage.py runserverOutput:

After running the server if you see output something like this then you are going on the right track and you can open your project by going to http://127.0.0.1:8000/ this link in your browser. There you will find the text you added in the index.html file and now that our app is running let’s move to the translation part.

Step 3: Translation of Django project with gettext
1. generate a translation file
The first thing we need to do is create a directory in the example app we call that local then run the following command
django-admin makemessages -l hiHere -l is for language and hi is for the language Hindi you can use any other language you want, after running the command a directory will be created under the language name, and in the directory, you will find the djanog.po file
2. configuring the django.po file
If you scroll down in djano.po file you will find something like this
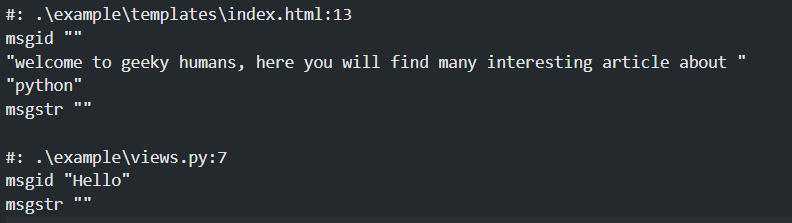
As you can see here we have our string and views that we added earlier in the template and below that, you can see the msgstr in there we will be adding the translated texts
#: .\example\templates\index.html:13
msgid ""
"welcome to geeky humans, here you will find many interesting articles about "
"python"
msgstr "geeky humans में आपका स्वागत है, यहाँ आपको python के बारे में कई दिलचस्प लेख मिलेंगे"

#: .\example\views.py:7
msgid "Hello"
msgstr "नमस्ते"
So now we added the translated text, we need to compile the file for that use the following command
django-admin compilemessages After running the command you will find that another file is been generated with the name of djanog.mo in the same directory as the dhango.po so that’s a good sign.
Now let’s check the app if it’s working or not for that we need to change the language of the app in the settings file, you just have to change the en-us language code to hi and it’s done (you have to use the language code that you used earlier)

Run the server and you will see the Hindi version of the text will appear in the browser.

Final Words
We hope you enjoyed our blog post about how to use gettext to internationalize your website. Since this is such a common problem, we hope that this article will provide you with some knowledge regarding how to deal with it. Here we changed the language manually to see the changes and it will also work automatically if someone will open the app in a browser that is set to the default language Hindi. If you have any questions or concerns, feel free to contact us using the information provided below. We appreciate your time and patience in reading our blog, and hope that you have a great day!