

TensorFlow is one of the most popular deep learning frameworks being used today. Deep learning is an increasingly important field in computer science that uses multiple computing layers to simulate complex data that could otherwise be time-consuming or even impossible to calculate without having human intelligence involved. In this blog, we will get into the nuts and bolts of what TensorFlow is, what its purposes are in terms of programming in general, how to go about setting it up in your system (Linux and Windows versions available), and lastly showcase a simple example of a basic example of TensorFlow. This tutorial will help you with a basic TensorFlow Python example to get started with.
It is a flexible and open-source library that allows us to build deep learning models. The Google brain team originally developed TensorFlow in 2015. Many data scientists tend to use TensorFlow because it makes building deep learning modeled a whole log easier, faster, and more reproducible.
It was created to be easy to use when programming. It can manipulate both single CPU systems, graphics processing units (GPUs), and mobile devices. It’s used in production environments of many mixed-usage systems consisting of one or two hundred machines.
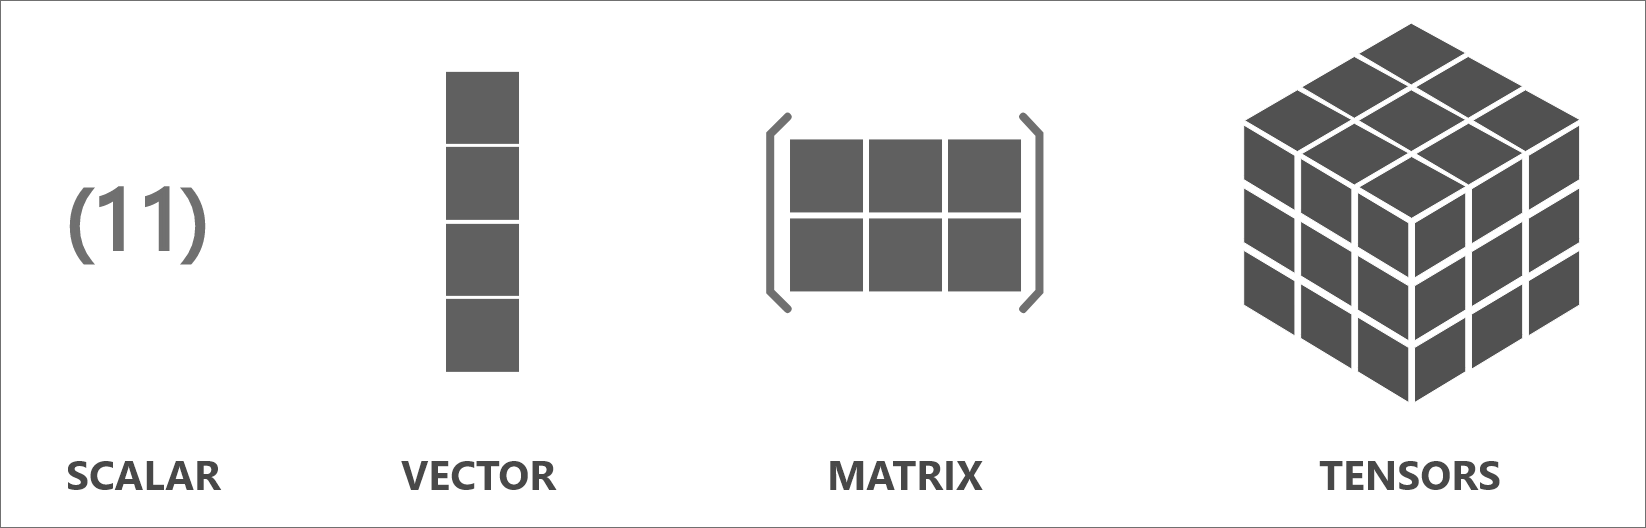
What is a Tensor?
TensorFlow supports arrays of data. If the data array has a single dimension, these can be called scalars. If the data array has two dimensions, they will be called matrices. If you have an array with more than two dimensions, TensorFlow refers to those as tensors. This convention makes sense since matrices and tensors are both types of arrays (or multi-dimensional arrays).
How to install TensorFlow :
Requirement for TensorFlow :
For this basic TensorFlow Python example you must already have the following things:
- Python 3.6-3.9
- Ubuntu 16.04 or later
- Windows 7 or later (with C++ redistributable)
- macOS 10.12.6 (Sierra) or later (no GPU support)
Install a Virtual Environment
It’s important to set up a virtual environment to work in a separate space from the default Python installation for your system. As such, you can use Virtualenv to make this happen. To do so, you must have the pip package manager onto your system since it will allow you to create and manage these environments.
Note: You need to upgrade your pip to install tensor flow; it does not support the old version 19.0 (or >20.3 for macOS).
You can check your pip version with this command.
pip3 --versionTo use TensorFlow, you need to install a virtual environment for that you need to use this command in your command prompt.
pip3 install --user virtualenvYou can check the version of virtual env using this command.
virtual --versionCreate a new virtual environment by selecting the Python interpreter
python3 -m venv --system-site-packages .\tensorflowActivate your environment by
.\tensorflow\Scripts\activateOnce activated, you should be able to see the name of your event in the terminal; something like this:
#Windows
(tensorflow)directories>

#Linux
(TensorFlow)username:~/directory$
You can deactivate your virtual environment at any time by using the following command:
deactivateInstalling TensorFlow
Even though using any of the available Tensorflow versions is fine, to make sure you’re running the most recent version of the formula compatible with it, be sure to install the most recent version.
You can install the latest version of TensorFlow with the following command:
pip3 install --upgrade TensorFlowYou can validate the installation and check the version of TensorFlow with:
# Ubantu/Mac
python3 -c 'import tensorflow as tf; print(tf.__version__)'

#Windows
python -c 'import tensorflow as tf; print(tf.__version__)'
A simple example of how you can use tensor flow:
In TensorFlow, one can define and describe a model by creating a model’s “Computation Graph” in abstract terms, and then when it is ready, putting it into practice in the session. Below is an example where I’ve constructed a simple graph.
import TensorFlow as tf

# creates nodes in a graph
# "construction phase"
i1 = tf.constant(4)
i2 = tf.constant(5)
In this section, we imported TensorFlow and created the nodes and operations required in a graph, so we had some values, and we can do anything we want with those values, such as multiplication:
# for the array, you can use matmul in place of mul
result = tf.mul(i1,i2)
print(result)
After running the code, you can see the output below, and the result is just a simple tensor. No actual calculations have been done; only operations are created.
Output:
(env) C:\Users\Desktop\Tensor-flow> python3 example.py
Tensor("Mul:0", shape=(), dtype=int32)
To view the results, we need to run the session. For creating the session, we generally build the graph first and then launch the graph.
# defineing our session and launches graph
sess = tf.Session()
# running the result
print(sess.run(result))
you can also assign the output from the session to a variable
output = sess.run(result)
print(output)
And when you run the code, you can see output like below, and you can see the result:
Output:
(env) C:\Users\Desktop\Tensor-flow> python3 example.py
Tensor("Mul:0", shape=(), dtype=int32)
After you are finished with a session, it’s important to close the session to free up the resources used in this process. It is just like a file. If you open it, you need to close it.
sess.close()Or you have another option to utilize python with the statement. It uses the session for the block of code, follows the statement, and then closes the session automatically when it’s done. Its works the same way as you open the file with the statement.
with tf.Session() as sess:
    output = sess.run(result)
    print(output)
And after you run the code, you receive the same result as before. Since TensorFlow supports Python integration, you can also use it with NumPy and OpenCV to give your program the ability to process what it sees in real-time.
Final Words
In this article, we have pretty much gone over what TensorFlow is and tensor how to install and use it. We even look through a simple example of TensorFlow. Now that we have gone over the basics of Tensorflow, We hope you have gained a better understanding of what it is and how you can use it.
The important thing that you have to keep in mind is that you have this computation graph where you kind of model everything so the number of nodes in our network in the number of layers and the starting values and stuff like that is going to be built into our computation graph of nodes in our network and the number of layers, the starting values and stuff like that is going to be built into our computation graph. I hope this tutorial helped you with a basic TensorFlow Python example to get started with.
If you have any questions, please feel free to leave them in the comments below. If you found this article useful, please feel free to share it so others can also get to know about it.
Here are some useful tutorials that you can read apart from this basic TensorFlow Python example: