
Python is a programming language that has become quite popular lately. It has enjoyed the support of big companies such as Google and Yahoo and has been used in developing some of their famous products. One of the reasons for its popularity is the easy access to libraries, which is one of its outstanding features. Using and building these packages, be they community-based or not, is one of Python’s main highlights. The ease with which you can get access to these libraries through PyPi is one of the reasons for its popularity. But that beginning said you might be wondering, how can one go about distributing their package to the masses? In this tutorial, we are going to introduce a step-by-step guide to help you on how to publish Python package on PyPi so that it is available to every Python user. I’ll use a real end-to-end example so that all the steps are crystal clear.
Create a simple Python project
Note: If you already have a project up and running then you can skip to the next part.
Now, just to publish a package, some developers choose to build their packages and make sure they work perfectly. That’s also a valid option. However, Pypi isn’t too concerned with the quality of the packages that they allow on their site. This means you can upload anything, even if it is something particularly useless. Why would anyone want to do that? Well, because they can!
This tutorial uses a simple project named example_package. We recommend taking the time to go through this tutorial before thinking about your project.
To create a package, create a folder that is named exactly how you want your package to be named. Then create the following file structure on your system:
pypi_tutorial
└── src
    └── example_package
        ├── example.py
        └── __init__.py
__init__.py is the file required to import the directory as a package. It used to mark which classes you wanted the user to access. It should be empty for now.
example.py is an example of a module, within the package that would contain the logic of your package i.e. functions, classes, constants, etc. You can add whatever you want here, be it a hello world program or something else. Here I’ll be creating a calculator like a program:
def add_one(number):
    return number + 1
Create the package
After creating the files above files, we will now add files that are used to prepare the project for distribution. cd into the project folder pypi_tutorial, and run the following command:
#Linux/Mactouch LICENSE setup.cfg README.md pyproject.tomlmkdir tests
#Windowscd . > LICENSEcd . > setup.cfgcd . > README.mdcd . > pyproject.tomlmkdir tests
Your project directory should look like this when you’re done:
.
├── LICENSE
├── pyproject.toml
├── README.md
├── setup.cfg
├── src
│   └── example_package
│       ├── example.py
│       └── __init__.py
└── tests
Configuring Build tools
pyproject.toml is like a recipe book used by bakers in their workplace. It contains all the information needed to make your project (including libraries, modules, etc). Since we are using Setuptools and wheel in the project we made above, we will demonstrate using that library. Add the following code to pyproject.toml:
[build-system]
requires = [
    "setuptools>=42",
    "wheel"
]
build-backend = "setuptools.build_meta"
requires helps us specify the packages that are needed to build your package.
build-backend is the Python object that will perform the build. If you were to use a different build system those would go here.
Configuring metadata
There are two types of metadata: Static, which is stored in setup.cfg. As it states, it is static and does not change according to situations, but in turn, guarantee to be the same every time. Dynamic metadata is stored in the setup.py file and works in exactly the opposite way. We will use the static method just for simplicity’s sake.
Now Open setup.cfg and paste the following code:
[metadata]
name = pypi-tutorial-package
version = 0.0.1
author = Paper
author_email = papersharma675gmail.com
description = A small example package
long_description = file: README.md
long_description_content_type = text/markdown
url =
project_urls =
    Bug Tracker =
classifiers =
    Programming Language :: Python :: 3
    License :: OSI Approved :: MIT License
    Operating System :: OS Independent

[options]
package_dir =
    = src
packages = find:
python_requires = >=3.6

[options.packages.find]
where = src
This is a basic config file by any means for a package. The first thing you should do here is change the details according to your project i.e. change the name, author, email, description, required Python version, etc. After that, if you want even more customization or look around what else can you add here you can look into Pypa’s setuptools docs or Configuration parsers.
Creating README & LICENSE
Note: Adding both of these files is important. Do not skip this!
Now, this step is pretty self-explanatory, just add whatever instructions or notes you want to present to your package’s user within the README.md file.
It is also vital for every package uploaded to the PyPI or anywhere for that matter to include a license. This informs users who install your package of the terms under which they can use your package. If you want help deciding what license you should choose visit this website https://choosealicense.com/.
Generating distribution archives
Next, for the distribution of our project, we need to generate distribution archives. These archives are the actual files that will be uploaded to the Pypi and then can be installed by pip.
To do this, make a sure version of pip is installed on your system first:
python3 -m pip install --upgrade buildThen, go to the project directory, pypi_tutorial, where pyproject.toml is located, and run this command:
python3 -m buildAnd if it worked successfully, you should get a result like this:

As you can see it has generated two files and these two are our archives! The tar.gz file is a source archive whereas the .whl file is a built distribution. You can locate them in the newly created dist folder.
Uploading the archives
Now to upload our project to Pypi you will have to register an account on Pypi to upload a package. For this tutorial, I will be using TestPyPI which is a separate instance of Python designed to test out and experiment with, well projects like this. Just go to their registration page and fill out the forum and follow through the process.
Note: Even if you want to upload your archive to the real index, you can follow the same process.
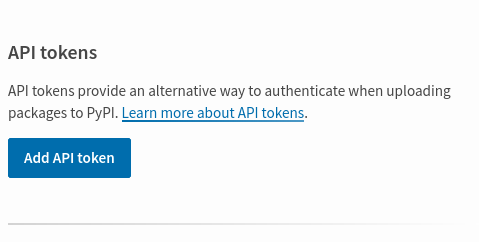
Now that you’ve created and activated your account, we can start the uploading process. First of all, we will need API tokens, to get them, go to the bottom of your Account settings page and click on the Add API token button.
Here, enter whatever Token name you want and select the Scope to Entire account (all projects) then click on Add Token
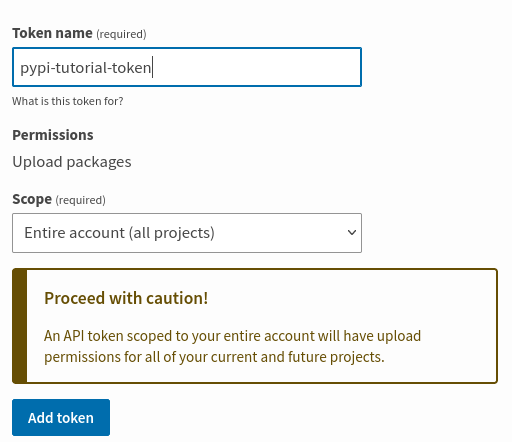
From here save the token at a safe place because this will only be shown once.
Now that we are finally registered, we can use twine to upload our archives. You can install twine with:
python3 -m pip install --upgrade twineAfter that run twine to upload the two archives under dist:
python3 -m twine upload --repository testpypi dist/*And if it ran successfully, you would get a result like this:

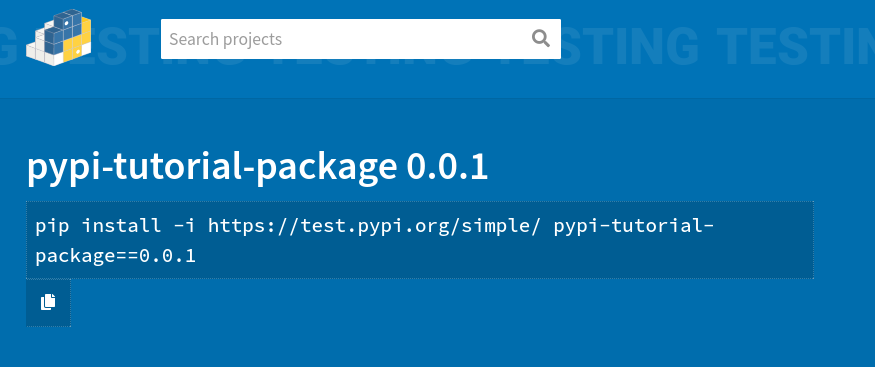
Here, as you can see the project is created and is available here https://test.pypi.org/project/pypi-tutorial-package/0.0.1/. Now you can visit and install it!
Testing out the newly uploaded package
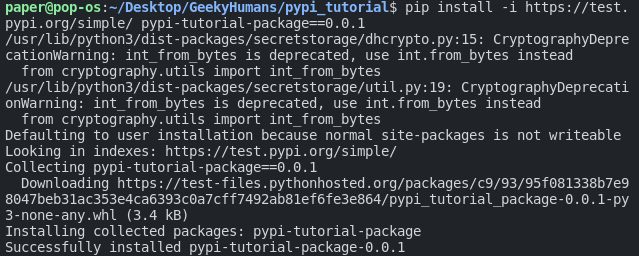
You can now use pip to install your package and verify that it works. Just run the command on your terminal or cmd:
pip install -i https://test.pypi.org/simple/ pypi-tutorial-package==0.0.1The output would look like this:
Now, let’s run some tests with it. Open the python interpreter and run the following commands:
python3Then import the package:
from example_package import example
example.add_one(2)
If you run this you would get results like this:

Final Words
In this article, we have gone through the steps to upload your first Python package on PyPI. This was a good start for us to learn how to publish Python package on PyPI. There are still a lot of things we need to figure out on the way. This is a simple way to build your package by yourself. If you have any questions, please feel free to leave a comment below, and I’d be happy to answer them.
Here are some useful tutorials that you can read:
- Concurrency in Python
- Basic Neural Network in Python to Make Predictions
- Monitor Python scripts using Prometheus
- Test Your Typing Speed Using Python
- How to create a Word Guessing Game in Python
- Convert an image to 8-bit image
- Schedule Python Scripts with Apache Airflow
- Create Sudoku game in Python using Pygame
- How to Deploy Flask API on Heroku?
- How to Update your Mac Address using Python